Bridal Hair Pin Ideas: Pearl, Crystal & Floral Styles


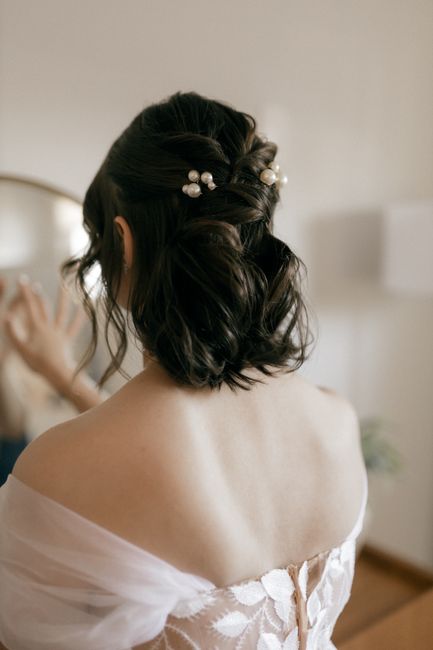
Bridal hair pin ideas are the easiest way to add polish to a wedding hairstyle without committing to a large headpiece. A handful of small pearl or crystal pins can lift a plain braid, soften a sleek bun, or fill the gaps around a veil comb. They are light, inexpensive and flexible enough to suit almost any neckline, dress fabric and venue.
Pins also solve a problem that bigger accessories create. A comb or headband sits in one place, while pins can be scattered, clustered or lined up wherever your style needs a little detail. That means your stylist can adapt on the morning of the wedding, and you are not stuck with a single placement if the hairstyle turns out differently than the trial.
The trade-off is that pins are small, and small things go missing. Pearls can pop off, crystals can dull against a shiny serum, and a pin that looks perfect in the package can slide out of fine hair within an hour. Choosing the right size, finish and quantity matters more than choosing the prettiest pin.
This guide walks through the main styles, how to place them in different hairstyles, how many to order, and how to keep them secure through a ceremony, a long photo session and a dance floor.
Pearl Hair Pins for a Classic Look
Pearls are the most popular choice for bridal hair pins, and for good reason. They read as timeless, pair with ivory, white and champagne gowns, and look equally at home in a church or a garden. Pearl pins are also forgiving. A slightly uneven placement still looks intentional because the soft sheen blends with natural hair rather than competing with it.
Look for pins with a mix of sizes, because a uniform row of identical pearls can feel stiff. A large multipack like the Maitys 44-Piece Wedding Hair Pin Set, around $11 to $16 and rated 4.3 stars across thousands of reviews, gives you a mix of pearl and crystal pins in different sizes, so you and your stylist can experiment and still have plenty left over for the bridesmaids.
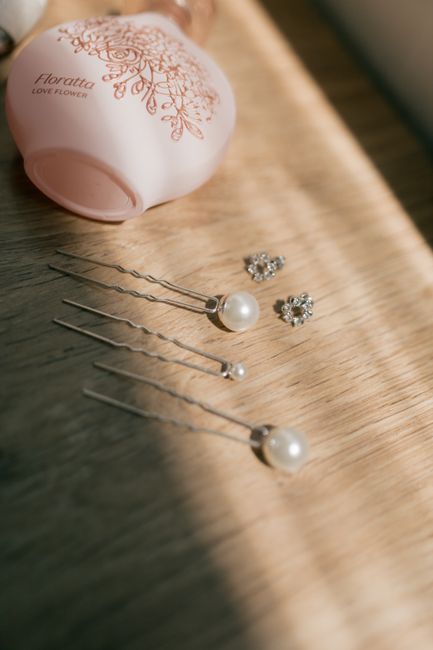
For a classic low bun, place three to five pearl pins in a gentle curve along one side, spacing them unevenly so the line looks natural. For a half-up style, tuck a small cluster just behind the ear where the hair is gathered, which hides the base of the pin and lets only the pearl show.
Pearls do chip and scratch, so keep them away from hairspray until they are in place. Spray the hair first, set the pins, then hold the can at arm's length for a light finish. If a pearl does come loose, a tiny dab of clear craft glue on a cool pin usually fixes it for the day.
Match the tone to your gown. Cool white pearls suit bright white fabrics, while warm cream pearls complement ivory and champagne. Hold a pin against your dress in daylight before you decide, since indoor lighting can make the two look closer than they are.
Crystal and Rhinestone Pins for Sparkle
Crystal pins bring more shine than pearls and show up well in photographs, especially in evening light or at venues with candles and string lights. They work best when the hairstyle is simple, because the sparkle already provides the focal point. A smooth chignon or a sleek low ponytail with a handful of crystal pins looks polished without feeling busy.
Because crystals catch light differently from different angles, they can look a little scattered if you use only one or two. Plan on a group of at least five or six, and arrange them in a pattern such as a small arc, a loose diamond or a staggered line. A mixed set that includes both round and teardrop shapes gives a more natural result than identical stones.
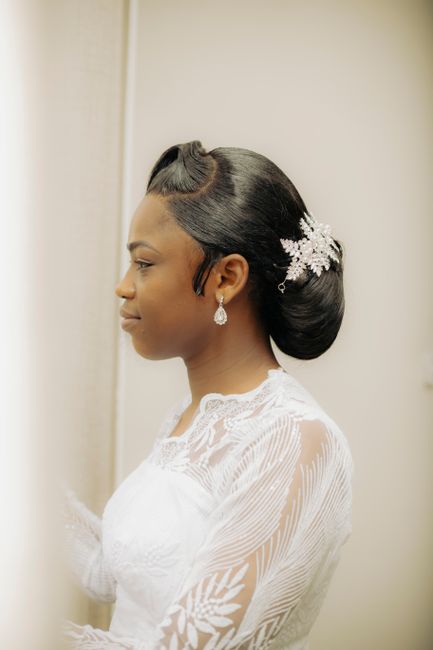
Silver-toned crystal pins suit cool white gowns and modern venues, while gold-toned pins pair well with ivory, champagne and rustic or garden settings. If you plan to wear metal jewelry, match the tone of your earrings and necklace to your pins so the overall look feels cohesive. You do not need an exact match, but clashing metals near your face can look accidental.
Test the grip before the wedding. Heavier crystal pins can slide in slippery or freshly washed hair, so ask your stylist to prep your hair with texturizing spray or a light backcombing before placing them. For fine hair, choose smaller pins with a curved prong, which hold more reliably than a straight pin.
If you are wearing a veil, set the crystal pins before the veil comb so you can see how the two interact. A veil that sits over a cluster of crystals can catch on the stones, so leave a little space between the veil base and the nearest pin.
Floral Pins and Vines for a Romantic Style
Floral pins add softness that pearls and crystals alone cannot. Small porcelain, fabric or pearl-and-wire blossoms tuck neatly into braids and twists, and they suit boho, garden and vintage looks. They also pair well with fresh flowers, so you can echo your bouquet without risking wilted petals in the heat.
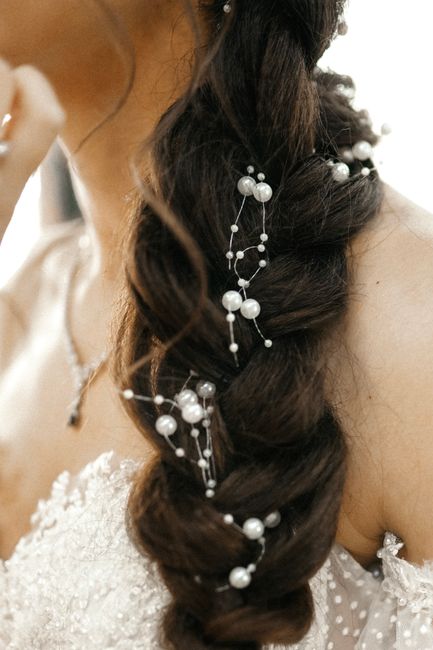
If you like the look of pins but want something more continuous, a vine is a useful companion. The Edary Bridal Pearl Hair Vine with Flowers, typically $12 to $18, layers small blossoms with pearls and crystals for a boho-romantic look that works with both down styles and braids. Use pins to secure the vine and add small accents where it bends.
For longer designs, a vine such as the Missgrace Extra Long Bridal Hair Vine, a 19.7-inch crystal and pearl piece for around $13 to $18, can wrap around a bun while individual pins secure the base. Our guide to wedding hair vine ideas covers more ways to shape and place one.
Fresh flowers can be pinned in place, too, but they need preparation. Ask your florist to wire the stems and keep the blooms hydrated until the last minute. Small, sturdy flowers such as spray roses, baby's breath and waxflower hold up far better than delicate petals.
When mixing floral and metal pins, keep one element dominant. If the flowers are bold, use only a few small pearl pins as support. If the flowers are tiny, you can add more crystal accents. Balancing the visual weight keeps the hairstyle from looking crowded.
Where to Place Pins in Different Hairstyles
Placement does more for a hairstyle than the pins themselves. A well-placed handful can look expensive, while the same pins scattered randomly can look like leftovers from a craft box. Think about where the eye naturally travels and put the sparkle along that path.
For a low bun or chignon, follow the curve of the bun and place pins along the edge, working from the nape upward. Three to seven pins is usually enough. For a high bun or ponytail, cluster them at the base where the hair is gathered, which hides the elastic and draws attention upward.
For loose waves, pin one side back and place two or three accents along the pinned section, so the sparkle frames the face without weighing the hair down. For braids, slide pins in along the weave at intervals, which makes the braid look jeweled without needing a bulky accessory.
For a half-up style, group pins just under the section that is pinned, where the hair crosses from the top to the loose lengths. This spot is hard to see from the front but shows in profile and from behind, which is where many ceremony photos are taken.
If you are wearing a veil, the safest placement is on the opposite side or lower than the comb. Pins near the veil base can snag the tulle and pull it out of position when you move. A good rule is to place the veil first, then add pins around it rather than the other way around.
Always test your placement at the hair trial. Take photos from the front, side and back, and move your head the way you will on the day. Pins that look great in a mirror can disappear in a photo, and pins that look busy in person can look balanced on camera.
Pearl and Crystal Combs as Partners for Pins
Pins and combs work best as a team. A comb gives you one strong focal point, while pins fill in the edges and keep the style from looking flat. The combination also adds security, because the comb anchors the hairstyle and the pins support it.
A warm-toned design such as the GORAIS Rose Gold Bridal Hair Comb, around $14 to $20, combines pearls and crystals on a rose gold frame for a piece substantial enough to anchor an updo on its own. Rose gold flatters warm and neutral skin tones and pairs easily with blush, terracotta and champagne palettes, and a few matching pins around it make the set look intentional.
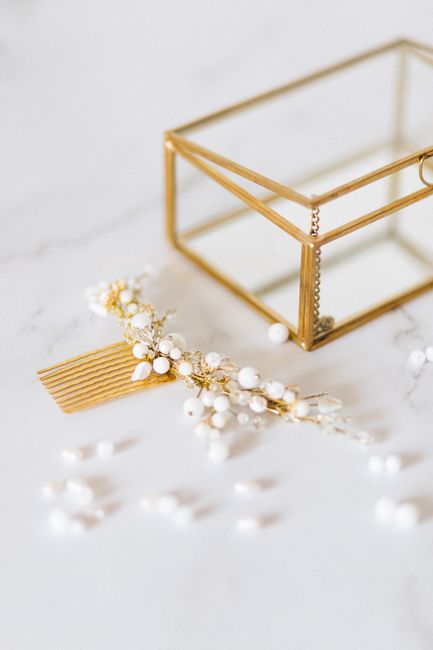
Place the comb first, since it is the heaviest piece and needs a solid anchor point. Then add pins on either side to echo its color and shape. If the comb has pearls, choose pearl pins. If it has crystals, use crystal pins. Mixing the two works when the metal tone is consistent.
For more ideas on matching your accessories, browse our bridal hair comb ideas and our wider guide to bridal hair accessories. Both cover how to build a look that does not feel overdone.
Keep the total number of accessories in check. As a rule of thumb, choose one statement piece and a handful of smaller supporting pieces. If you are wearing a comb, a vine and a dozen pins, the hairstyle may start to compete with the dress. Remove one element at the trial and see whether you miss it.
How Many Hair Pins Do You Need?
The right quantity depends on the hairstyle, the pin size and how many people you are buying for. A bride wearing a sleek bun typically uses five to nine decorative pins, while a bride with a braided updo might use ten to fifteen. Add a handful of plain bobby pins in your hair color for structural support, because decorative pins are often too delicate to hold the style alone.
Buy more than you think you need. Pins get lost, bent and dropped in the chaos of the getting-ready morning, and a spare handful in a small zip bag can save a lot of stress. A multipack is the most cost-effective route, because you also have enough left to share with bridesmaids or flower girls.
Bridesmaids can use the same pins in a simpler arrangement. Two or three pins per bridesmaid, placed on the same side, creates a coordinated look without matching the bride exactly. This keeps the bride as the focal point while still tying the group together.
Pack a small touch-up kit for the day. Include a few spare pins, a mini hairspray, a comb and a small tube of clear craft glue. Hand it to a bridesmaid or your planner so that fixes can happen quickly between the ceremony and the reception. Our wedding emergency kit essentials guide covers what else belongs in the bag.
Finally, check for sharp edges. Cheap pins can have rough prongs that scratch the scalp, which becomes uncomfortable after several hours. Run a finger along each pin before the day, and set aside any that feel sharp.
Keeping Pins Secure All Day
A pin that falls out during the first dance is a small but real annoyance. A few simple steps will keep your pins in place from the first photo to the last song.
Start with the hair itself. Clean, freshly washed hair is often too slippery for pins. Stylists commonly prepare the hair with texturizing spray, dry shampoo or light backcombing, which gives the pins something to grip. Ask your stylist to do this at your trial so you know it works.
Insert the pin in the right direction. The curved side should face the scalp, and the prongs should point toward the hair's natural direction of growth. Slide the pin in against the grain first, then turn it back, which locks it into the hair and reduces slipping.
Use support pins for heavier pieces. If a decorative pin looks like it will slide, add a plain bobby pin that crosses it in an X shape. The plain pin is hidden underneath, and the decorative pin sits on top without carrying the whole load.
Test the movement. Before you leave the hair trial, shake your head, nod and turn quickly, and have your stylist check that nothing shifts. If a pin moves, swap it for a smaller or grippier one. It is much easier to fix this at the trial than on the wedding morning.
Finally, plan for removal. Take pins out one at a time, and keep a small dish nearby so nothing disappears into the carpet. Detangle gently, because hairspray and backcombing can knot the hair, and a leave-in conditioner makes the process easier at the end of a long night.
Bridal Hair Pin FAQ
- How many bridal hair pins should I use?
Most brides use five to nine decorative pins for a sleek bun and ten to fifteen for a braided updo. Add plain bobby pins underneath for support, and buy a few spares. A multipack keeps the cost low and leaves extras for bridesmaids.
- What are the best bridal hair pins for fine hair?
Choose smaller, lightweight pins with a curved prong, since they grip better than large, heavy ones. Ask your stylist to add texture with spray or light backcombing before pinning. A hidden plain bobby pin crossed under each decorative pin adds extra security.
- Can I wear hair pins with a veil?
Yes, but place the veil first and add pins around it rather than near the comb. Pins close to the veil base can snag the tulle. Keep a small gap between the comb and the nearest pin so the veil moves freely.
- Should hair pins match my jewelry?
They do not need to match exactly, but the metal tone should be consistent. Pair gold-toned pins with gold earrings and silver-toned pins with silver. Pearls are neutral and work with almost any metal, which makes them a safe choice.
- Do bridesmaids need matching hair pins?
They can wear the same style in a simpler arrangement, such as two or three pins on one side. This ties the group together without matching the bride. A multipack usually includes enough for everyone.
- How do I stop pearl hair pins from falling out?
Prep the hair with texturizing spray, insert pins against the grain, then turn them back to lock them in. Cross a plain bobby pin underneath for support, and test the hold at your trial by shaking and turning your head.